

How to Test Tap Water for Contaminants at Home
Last Updated: November 17, 2026
Quick Summary
To test tap water for contaminants at home, start by deciding whether you need a basic screen or a full laboratory panel, based on your water source, plumbing age and any symptoms. Use a home kit for a quick first look, and send samples to a UKAS-accredited laboratory when results must be reliable.
- Mains water is monitored by the supplier, so concern is usually about pipes inside your home.
- Homes built before the 1970s may have lead pipework, so test for lead first.
- Take a first-draw sample after running no water for at least six hours.
- Home kits cost around £10 to £30, while accredited laboratory panels cost about £50 to £120 or more.
- A detection is not the same as an unsafe level; compare results against the applicable limit and retest.
Table of Contents
- Why Test Your Tap Water and When It Is Worth Doing
- Choosing the Right Test: A Decision Guide by Source, Plumbing and Symptoms
- Tap Water Testing Kit or Laboratory Water Testing: Pros, Cons and Costs
- How to Test Tap Water for Lead
- Step-by-Step Sample Collection Checklist
- Reading Your Results and the Drinking Water Quality Report
- What to Do After a Positive or Borderline Result, Including Laboratory Water Testing
- Frequently Asked Questions
Why Test Your Tap Water and When It Is Worth Doing
Testing tap water for contaminants is worth doing whenever you have a specific reason to doubt what comes out of your kitchen tap, and a simple test tap water check can show whether your concern is justified.
Water companies must meet the standards set out in the Water Supply (Water Quality) Regulations 2016 at the point where water leaves their network (The Water Supply (Water Quality) Regulations 2016).
Testing is most useful in a few situations.
For most people, a single well-chosen test gives more useful information than guessing.
Choosing the Right Test: A Decision Guide by Source, Plumbing and Symptoms
The right test depends on where your water comes from, how old your plumbing is, and what you have noticed. Rather than ordering every test available, work through the four questions below in order. Each answer narrows the panel you actually need.
Step 1: Establish the source
Mains water from a licensed supplier is monitored routinely by the water company against the Water Supply (Water Quality) Regulations 2016, so your concern is usually what happens between the street and your tap. Private supplies from a well, borehole or spring are the owner's responsibility and need a fuller panel, typically including bacteriological parameters such as E. coli and coliform bacteria, plus nitrate, nitrite, iron, manganese, arsenic and hardness. If you are unsure which category you fall into, check your water bill or ask the supplier.
Step 2: Assess the plumbing
Lead is the main concern in homes built before the 1970s, and in any property where lead pipework or lead solder may remain. Copper can leach from newer copper pipe, particularly when water has been standing overnight. If your home has lead pipes or lead solder, a lead test should be your first choice. If you have recently had plumbing work, a metals panel covering lead and copper is the sensible starting point.
Step 3: Match the symptom to the likely contaminant
- Metallic taste, blue-green staining on sinks or laundry: copper or other metals
- Cloudiness, musty or earthy smell: bacteria, sediment or organic matter
- Unusual colour after standing: iron, manganese or corrosion products
- Unexplained stomach upsets in the household: a microbiological test first
- No obvious problem: a basic screening panel at intervals is enough
Step 4: Decide how much certainty you need
A home kit is fine for a first look at hardness, pH or a single metal. If the result will be used to challenge a landlord, support a private-supply duty or inform a health decision, go straight to a UKAS-accredited laboratory so the report stands up to scrutiny.
A simple decision tree
- Private supply? Run a full bacteriological and chemical panel through an accredited laboratory.
- Mains supply, pre-1970s home or lead pipework? Test lead first, using a first-draw sample.
- Recent plumbing work or blue-green staining? Test copper and lead.
- Taste, smell or colour change? Test metals and bacteria.
- No obvious problem? A basic check every few years is enough.
Watch out: testing for the wrong contaminant wastes money and can create false reassurance. If two concerns overlap, such as an old house on a private supply, run the fuller panel rather than choosing one test.
Tap Water Testing Kit or Laboratory Water Testing: Pros, Cons and Costs
A home tap water testing kit is quick, cheap and suitable for screening. Most kits use colour-change strips or a simple reagent, and results appear within minutes. The drawback is accuracy. Kits typically detect only a handful of contaminants, and they rarely measure lead or bacteria at the low levels that health guidance uses. Because a screening kit cannot confirm safety, knowing which common tap water contaminants it may miss can help put its results in context.
Laboratory testing costs more and takes longer, but it gives you a formal result. A UKAS-accredited laboratory uses validated methods and reports concentrations against recognised limits. This matters if you are dealing with a landlord, a private supply, or a health concern. Turnaround is usually several working days.
Pricing breakdown by testing method
| Testing method | Typical cost (GBP) | Turnaround | Best for |
|---|---|---|---|
| Basic home test kit | Around £10 to £30 | Minutes | Quick screening of taste or colour |
| Mid-range home kit | Around £30 to £80 | Minutes to hours | Lead, copper, hardness |
| Accredited laboratory, basic panel | Around £50 to £120 | About 3 to 10 working days | Lead, copper, bacteria |
| Accredited laboratory, full panel | Often £150 or more | About 1 to 2 weeks | Private supplies and health concerns |
Prices vary by provider and contaminant, so check the current fee before you order. Before trusting a filter maker's lab claims, see how to verify water filter lab testing. The sensible choice is a kit for a first look, then a laboratory test if the result is unclear or serious.
Typical cost of tap water testing methods (GBP)
How to Test Tap Water for Lead
Lead is the contaminant most worth testing for in older UK homes.
Take a first-draw sample. Run no water for at least six hours, usually overnight, then collect the first litre from the cold kitchen tap without running it.
Use a sterile container supplied by an accredited laboratory or a kit that specifies lead testing. Do not use a jam jar or a recycled bottle.
A common mistake is testing after running the tap, which hides the problem. For a broader walkthrough, see how to test tap water quality in general. The first-draw result is the one that reflects your plumbing.
Step-by-Step Sample Collection Checklist
Good results depend on a good sample. Use this checklist before you collect water:
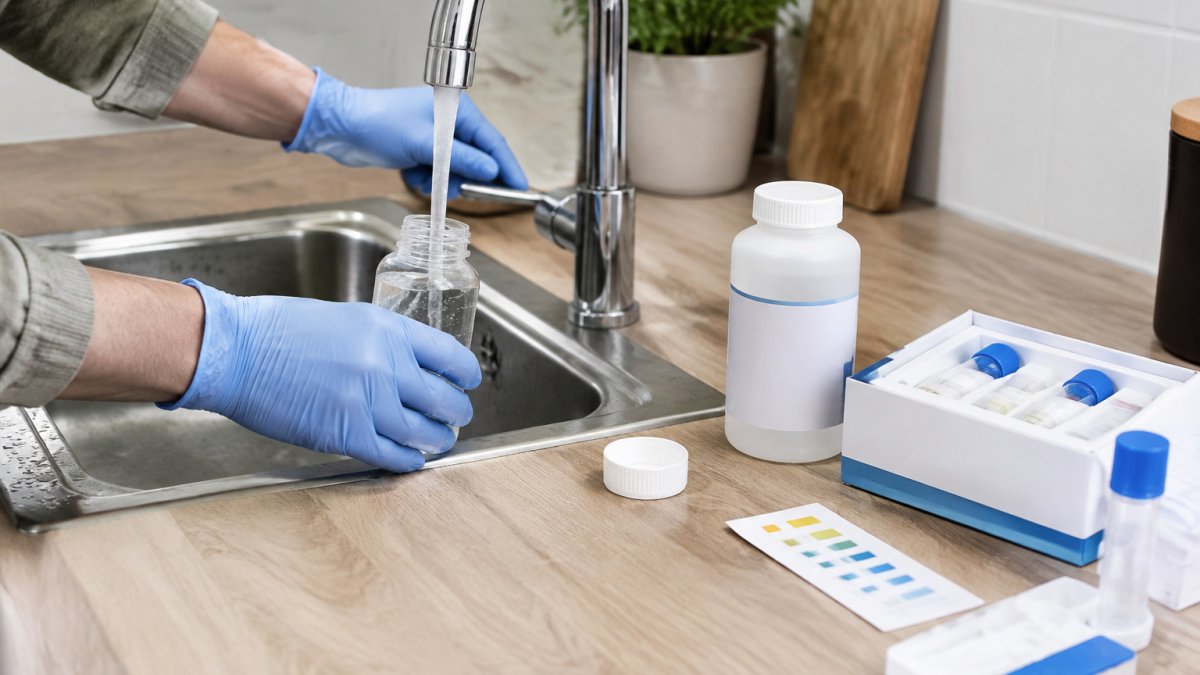
- Choose the tap you use most for drinking water
- Remove the aerator (the mesh at the tap end) and wipe the tap with a clean tissue
- Do not run water for at least six hours before a first-draw sample
- Wash your hands and wear clean gloves if the laboratory asks for them
- Fill the sterile bottle to the marked line without touching the inside of the lid
- Label the bottle with the date, time and tap location
- Keep the sample cool and send it as soon as the laboratory allows
- Record the time between sampling and posting, as laboratories often require this
Samples for bacteria need the most care. Use a sterile bottle, avoid touching the rim, and send them quickly, because bacteria can multiply if the sample is left warm.
Reading Your Results and the Drinking Water Quality Report
A laboratory report lists each contaminant, its measured value, the method used and the relevant limit. Read it in three passes: units, detection limits, then the limit itself.
Check the units first
Lead is usually reported in micrograms per litre (µg/L), and copper is also reported in µg/L (Drinking Water Standards and Regulations). Nitrate is usually reported in milligrams per litre (mg/L). Check the current limits in the regulations or with the Drinking Water Inspectorate before comparing a result. Hardness may be given in mg/L as calcium carbonate or in English or French degrees, so confirm which unit the laboratory uses before comparing with any guidance. Bacteria results are usually reported as present or absent per 100 ml, not as a concentration.
Understand detection limits
Every method has a detection limit, the lowest concentration it can reliably measure. A result reported as "less than" a value, for example "less than 1 µg/L", means the contaminant was not detected above that level. It does not mean the water contains zero. If the detection limit is above the health-based limit, the test cannot confirm compliance, and you should ask the laboratory whether a more sensitive method is available.
Distinguish a detection from an unsafe concentration
Many contaminants are routinely detected at concentrations far below the limit. A detection is not the same as a breach. Compare the measured value with the limit that applies to your supply, and treat a value close to the limit as a reason to retest rather than a reason to panic. A single result is a snapshot; repeat sampling shows whether a finding is persistent.
Apply the correct standard
Public mains water must meet the standards set by the Water Supply (Water Quality) Regulations 2016. Private supplies are judged against the same parameters, but the responsibility for acting on results sits with the owner. If your report covers a contaminant not listed in those regulations, ask the laboratory which benchmark it has used.
Use the water company report as context
Your water company publishes an annual drinking water quality report showing results from its own monitoring. If the company's results are good but your tap results are poor, the problem is likely inside your home, in the pipework, fittings or storage tank. If both are poor, contact the supplier.
Watch out: comparing a first-draw lead result with a limit intended for a flushed sample, or mixing units such as µg/L and mg/L, are the two most common reading errors. Confirm both before drawing conclusions.
What to Do After a Positive or Borderline Result, Including Laboratory Water Testing
If your result is above the limit, or close to it, take practical steps straight away. For a lead result, avoid using untreated tap water for drinking, cooking or making baby formula until you have a plan.
Notify your water company if the problem seems to originate in the public supply. If you rent, tell your landlord in writing and keep a copy of the result. Councils can also be involved in private supply issues.
Treatment is a separate step. Our guide on how to remove heavy metals from water covers the treatment options in more detail.
Retest after any change, whether that is a filter installation, a plumbing repair, or a switch to a new supply. If copper is the issue, our guide on how to reduce copper levels in drinking water sets out practical steps.
Frequently Asked Questions
How can I test my tap water for contaminants at home?
Start with a home test kit that matches what you want to check, such as lead, bacteria, hardness or chlorine. Follow the instructions exactly, collect the sample from the cold kitchen tap after running it for a short time, and compare the colour or reading against the kit's chart. Home kits are useful for screening, but they cannot confirm every contaminant. If results are unclear, or you suspect lead or bacteria, send a sample to an accredited laboratory for a full analysis.
What contaminants can a home water test kit detect?
Most home kits screen for common issues such as lead, copper, iron, hardness, chlorine, pH and some bacteria. Many do not detect pesticides, PFAS or microplastics, which need specialist laboratory methods. Check the kit's specification sheet before buying so you know exactly which parameters are covered and at what detection level.
How do I test tap water for lead?
Lead is most often released from plumbing, so take a first-draw sample from the cold tap that has sat unused overnight, then a flushed sample after running the tap until the water feels noticeably colder. Use a lead-specific test kit for screening, or send the sample to an accredited laboratory for a quantitative result. Compare the result against the current lead limit for drinking water in the Water Supply (Water Quality) Regulations 2016 or ask the Drinking Water Inspectorate for the current figure, and speak to your water company if levels are high.
How often should I test my tap water?
Test at least once a year if you are on a mains supply and have no concerns, and more often if you notice changes in taste, odour or colour, have a private supply, or have recently done plumbing work. Retest after any flood, repair or change to the water source, and if a household member has symptoms you think may be linked to the water.
