

How to Test Tap Water Quality: A Step-by-Step Guide
Table of Contents
- Why and When to Test Your Tap Water Quality
- Choosing a Tap Water Testing Kit or Laboratory Service
- How to Collect a Water Sample Correctly
- Step-by-Step: How to Test Tap Water Quality at Home
- When to Book a Drinking Water Laboratory Test
- How to Test Water Hardness at Home
- How to Read Water Test Results and Compare to Guidelines
- What to Do If Results Show Contaminants or Are Ambiguous
- Frequently Asked Questions
Last Updated: October 17, 2026
Why and When to Test Your Tap Water Quality
Knowing how to test tap water quality starts with a simple fact: clear water is not proof of clean water.
In the UK, water suppliers must publish monitoring results, and the Drinking Water Inspectorate regulates them against strict standards.
That gap is why testing matters. Below, we'll show you when to test, how to collect a valid sample, and how to read the results without panicking.
Signs You Should Test Your Water
Test your water if you notice any of these:
- Cloudy, discoloured or gritty water
- A metallic or chlorine-heavy taste
- Persistent stomach upsets with no other cause
Choosing a Tap Water Testing Kit or Laboratory Service
The right route depends on what you want to know. A basic tap water testing kit gives a fast, cheap snapshot of a few common markers; a laboratory test gives a full chemical and microbial breakdown with detection limits you can trust.
Home Kits vs Professional Analysis
Here's the trade-off most guides skip: home kits are screening tools, not proof of safety. They detect broad changes well but cannot confirm the absence of a contaminant at very low levels.
| Option | Best For | What It Covers | Limitations |
|---|---|---|---|
| Test strips | Quick screening, taste and odour changes | pH, hardness, chlorine, nitrates | Low accuracy, easy to misread |
| Digital meters | Ongoing monitoring | TDS, pH | Does not identify specific contaminants |
| Laboratory analysis | Confirming safety, private supplies, pre-purchase checks | Full chemical and microbial panel | Higher cost, longer turnaround |
For a full drinking water laboratory test, look for a UK Accreditation Service (UKAS) accredited lab. Accreditation means an independent body has checked their methods and detection limits.
How to Collect a Water Sample Correctly
Most false or rejected results come from bad sampling, not bad water. A single error, touching the inside of the cap, filling too early, or posting late in the week, can invalidate a test you have paid for. The detail below separates a result you can act on from one you have to repeat.
Before You Open the Bottle
- Use only the sterile bottle the laboratory supplies. Household jars and food containers are not sterile and will introduce bacteria or chemical residue.
- Check the bottle's preservative. Some microbiology bottles contain a small amount of sodium thiosulfate to neutralise chlorine; do not rinse it out.
- Wash your hands thoroughly and dry them on a clean towel. Avoid hand sanitiser immediately before sampling, as residue can contaminate the sample.
Flushing and Filling
- Remove any aerator or filter cartridge if the laboratory instructs it. For bacteria tests, sample before any filter or softener.
- Run the cold tap at a steady flow for two to three minutes to clear standing water. This step is most often skipped and most often skews lead and copper results.
- Reduce the flow to a gentle stream to avoid splashing and aeration.
- Remove the cap and hold it by the outside edge only. Never place the cap face-down on the counter.
- Fill to the line marked on the bottle, leaving the small air gap the laboratory specifies. Overfilling can prevent proper mixing during analysis.
- Replace the cap immediately and tighten it firmly.
Labelling, Preservation and Delivery
- Label the bottle with the date, time, tap location (for example, kitchen cold tap) and whether any filter or softener was in use.
- Keep the sample cool, most laboratories specify refrigeration at around 4°C, not freezing, and out of direct sunlight.
- Deliver or post within the laboratory's stated holding time. Microbiology samples often have a 24 to 48 hour window, so avoid posting on a Friday.
If you are unsure which bottle or holding time applies, ask the laboratory before you book, a two-minute conversation prevents a wasted test.
Step-by-Step: How to Test Tap Water Quality at Home
Home testing takes about ten minutes and gives a useful first read. Here is our recommended sequence.
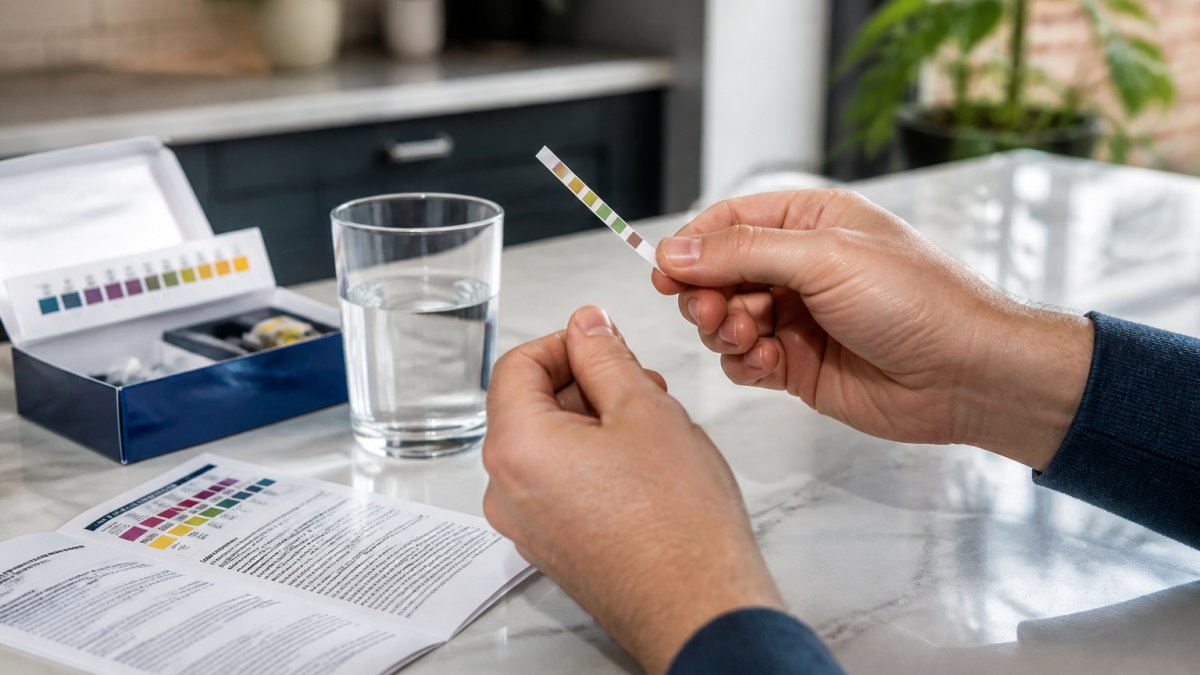
- Run the cold tap for two to three minutes to clear standing water from the pipes.
- Fill a clean glass and let it sit for a moment so chlorine can settle slightly.
- Read the kit instructions fully before you start, since timing is critical.
- Dip the test strip or insert the meter probe as directed.
- Shake off excess water and wait the exact time stated.
- Compare the strip colours in good natural light, not under a warm bulb.
- Record the readings with the date and tap location.
- Repeat once to check for consistency.
Using Test Strips and Meters
Test strips change colour based on the chemical reaction in each pad. Read them within the stated window, pads keep developing colour and give false readings if left too long.
A TDS meter measures total dissolved solids in parts per million, how much is dissolved, not what it is. High TDS may mean hard water or minerals, but it cannot distinguish harmless calcium from something worth investigating.
When to Book a Drinking Water Laboratory Test
Book a lab test when the answer needs to be defensible: a private well or borehole, a property you're buying, a rental with unknown plumbing, or any home with a vulnerable resident.
Private supplies are the clearest case: a private well sits outside the supplier's monitoring entirely, so checking it falls on whoever uses it.
For mains water, a lab test makes sense when:
- You've had repeated home readings you can't explain
- You suspect lead pipework or old solder
- Someone in the home is pregnant, an infant, or immunocompromised
Turnaround varies by panel. Bacteria results usually come back faster than a full chemical screen, so ask the lab for a realistic timeline before you book.
How to Test Water Hardness at Home
Hard water leaves limescale on kettles, shower screens and heating elements. Testing for it needs no lab.
Use a hardness test strip or a simple titration kit, which changes colour as you add drops. Compare the result against your supplier's published hardness figure for your postcode.
Hard water is not a health risk, but it affects how soap lathers, how appliances wear, and how water tastes.
How to Read Water Test Results and Compare to Guidelines
A laboratory report lists each contaminant with a result and a limit. Understanding how to read water test results comes down to three numbers: what was found, the detection limit, and the guideline value.
- Result: the level measured in your sample, usually in milligrams per litre (mg/l) or micrograms per litre (µg/l).
- Detection limit: the smallest amount the laboratory can reliably measure. A result of "not detected" only means the level was below this limit, not that the contaminant is absent.
- Guideline value: the maximum level considered acceptable. In the UK these are set out in the Water Supply (Water Quality) Regulations and summarised by the Drinking Water Inspectorate.
Comparing Your Figures
Use the Drinking Water Inspectorate guidance on water quality for the official standards, and compare your figures against those rather than against a generic online chart.
A result below the guideline value means that contaminant is within limits at the time of sampling. A result above means act. A result described as "not detected" needs one more check: look at the detection limit.
Borderline, Conflicting and Ambiguous Results
One reading is a snapshot. If a result is borderline, retest before drawing conclusions, ideally at a different time of day and after a different flushing period. Lead is a good example: levels can rise sharply after water has stood in old pipework overnight, so first-draw and flushed samples can tell different stories.
Ambiguous results usually trace back to one of four causes:
- Sampling error, the bottle was contaminated, the tap was not flushed, or the sample was delivered late.
- Detection-limit confusion, "not detected" was read as "zero".
- Natural variation, hardness, nitrate and some minerals fluctuate with source and season.
- A genuine borderline level, the water is close to the limit and needs monitoring rather than a single fix.
If two results conflict, trust the one with the better sampling record and the lower detection limit, and retest to confirm.
If a result is above the guideline value or you cannot interpret it, move to the next section: stop drinking from that tap, check the sampling record, and contact your water supplier or local authority as appropriate.
What to Do If Results Show Contaminants or Are Ambiguous
An unsafe or unclear result is a reason to act in order, not to panic.
- Stop drinking the water from that tap until you understand the result.
- Check the detection limit and whether the sample was taken correctly.
- Contact your water supplier if the issue comes from the mains supply.
- Contact your local authority if you have a private supply.
- Retest with a fresh, correctly collected sample to confirm.
- Fit appropriate treatment once you know what you're dealing with.
Ambiguous results usually trace back to sampling errors, a strip read at the wrong time, or a borderline level near the detection limit. Retesting resolves most of them.
This is where filtration earns its place: a well-chosen system removes the contaminants you've identified rather than guessing. By removing up to 99.9% of contaminants like forever chemicals, heavy metals, and microplastics, we empower you to prioritise your health and sustainability while enjoying significant cost savings over bottled water.
Frequently Asked Questions
How do you read water test results?
Compare the colour on your test strip or the number from your meter against the chart supplied with the kit. For laboratory results, check each parameter against the drinking-water guidelines; for example, lead should be well below 10 micrograms per litre. If any value is close to or above the limit, retest or consult your water supplier. Always read results within the stated time window, as strips can change colour if left too long.
Can I test the hardness of my water myself?
Yes. You can use a home hardness test kit, which usually involves adding drops of reagent to a water sample until it changes colour, or a test strip that indicates hardness in milligrams per litre as calcium carbonate. These kits are inexpensive and give a good indication. For a precise measurement, send a sample to an accredited laboratory. Knowing your hardness helps you decide whether a water softener or filtration system is worthwhile.
Are home water test kits accurate?
Home kits are useful for screening and spotting changes, but their accuracy varies. Test strips can be affected by storage, timing, and reading light, and they generally have higher detection limits than laboratory methods. They are reliable for indicators like pH, chlorine, and hardness, but not for trace contaminants such as lead or PFAS. For definitive results, especially if you suspect a health risk, use an accredited laboratory.
What should I do if my water test shows a contaminant?
First, check whether the level exceeds the drinking-water guidelines. If it does, stop drinking the water and contact your water supplier or local authority for advice. For private supplies, arrange a retest and consider installing appropriate treatment, such as a certified filter for the specific contaminant. If the contaminant is lead, run the tap for a minute before use and avoid hot water for drinking or cooking. Always retest after treatment to confirm it works.
Testing tells you what's in your water. Filtration fixes it. If your results show chlorine, microplastics or heavy metals, or you simply want cleaner, better-tasting water without bottled plastic, Waters Co can help. Get started with Waters Co and turn your test results into water you're confident drinking.